iOS Application Pentesting Part 1 : Introduction To iOS
In this
article, we will see essentials tools and environment which we required to perform
penetration testing and Vulnerability assessment on iOS Applications.
JailBreaking Your Device : ;)
First thing first, if you are very serious about iOS Application Pentesting then you should required a Jailbroken device with you.
Below we will see how we can JailBreak a iOS Device.
iOS JailBreaking have a great history, First pangu have Jailbroke the iOS then other team did the same.
Be frank to Jailbrea iOS device, First you need to check whether your Installed iOS Version is already JailBroken or not.
Note - For this particular tutorial we will use Xcode Simulator but highly recommended you to get A Jailbreak Device if you are very serious about learning iOS Application Pentesting.
Note - For this particular tutorial we will use Xcode Simulator but highly recommended you to get A Jailbreak Device if you are very serious about learning iOS Application Pentesting.
In my case on my iPad Air 2 I am using 9.3 which is JailBroken by Pangu Team few months back. You can find that information here

Every JailBreak is different, So i recommend you to check your installed iOS Version for JailBreaking.
JailBreaking Steps for iOS 9.3 is as below ( Taken From Pangu Website)
Preparation:
1. Pangu jailbreak IPA file NvwaStone_1.1.ipa available at http://pangu.io .
2. Cydia impactor available at http://www.cydiaimpactor.com/ .
(Special Note: This tool, developed by Saurik, is used to sign the ipa file so that Pangu jailbreak tool can be executed on iOS devices. Cydia impactors does not collect your apple id and password. All the information is only used for applying a personal free certificate from Apple.)
3. A computer (Cydia impactor runs on all major OSes, including Windows, OS X, and Linux)
4. A valid Apple ID. (In case that you do not want to use your current Apple ID to apply the personal certificate for any reason, we suggest you apply a new Apple ID and use it)
Option “Use embedded certificate effective until April 2017"
• If you chose the option "Use embedded certificate effective until April 2017", Pangu 9 will install an app that is signed by a revoked certificate. Before April 2017, you will not need reinstall Pangu jailbreak app.
• If you want to sign the app with your own certificate, do not select this option.
Limitations:
1. An Apple ID can only apply for a certificate for a limited number of devices.
2. The certificate will expire in 7 days. If your certificate gets expired, you need to follow the guide to install the jailbreak IPA again.
After Following those steps, Cydia & Pangu will be display on your Application Menu as below

And now you can access Cydia app, which have tons of application for JailBroken Devices.

Installing Required Apps & Package On Device
After JailBreaking the device, we need to install some of the important apps in it. Which will help us perform the pentest on the app and do various things.
Look for the Cydia App open it and search for "OpenSSH"
Tap on it and tap Install button, in my case its already installed so its showing Modify.


Lets try to SSH our device. First get the IP address of our device.
For this, Go to Settings>Wifi>Click On Your Access Point Name

As we can see the IP is 192.168.0.7. Lets do SSH on this as user root. By default the SSH password is alpine but i suggest you to change this to your own desired one due to Security Issues.
Command - ssh root@192.168.0.7

Great, So we are logged in :)
Lets continue our Apps installing part. Now we are installing BigBoss Recommended Tools which contents important hacking tools package like GNU Debugger, APT Transitional, GNU Debugger, Git, GNU Debugger, make, less unzip, wget SQLite etc. Which comes very handy for iOS Application Pentesting

Now we will install class-dump-z which allow us to dump class information from an iOS application.So we can download this from their Official Page

download can be found here [ https://storage.googleapis.com/google-code-archive-downloads/v2/code.google.com/networkpx/class-dump-z_0.2a.tar.gz ]

Now SSH into your device and download this file using wget.
wget https://storage.googleapis.com/google-code-archive-downloads/v2/code.google.com/networkpx/class-dump-z_0.2a.tar.gz
If you encounter any certificate verification problem, then use --no-check-certificate after wget command
wget https://storage.googleapis.com/google-code-archive-downloads/v2/code.google.com/networkpx/class-dump-z_0.2a.tar.gz --no-check-certificate

Next extract the downloaded file using tar.
Command : tar -xvzf class-dump-z_0.2a.tar.gz

After extracting, Go to iphone_armv6 directory
and copy the class-dump-z executable into /usr/bin/ directory
Command: cd iphone_armv6
Command : cp class-dump-z /usr/bin/
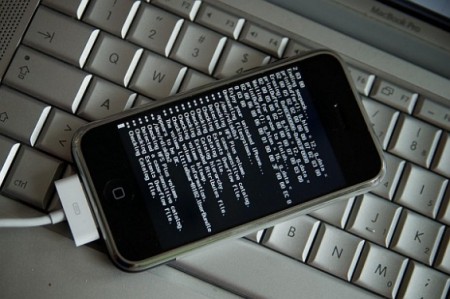
Command : class-dump [enter] (You will see its working)

Note - If your devices in 32 bit then class-dump will work without any issues. But if you device is 64 Bit then you will see an error while using class-dump.
In this case you have to install "pcre" from cydia app. After installing pcre you will be able to use class-dump on your 64 bit devices.

Lesson learned:
We saw that, how we can JailBreak our device and After it. How we can install various apps which will help us in iOS Application Pentesting.
Please share & do comment if you have any question.
No comments:
Post a Comment